
All About Notched Trowels
Introduction
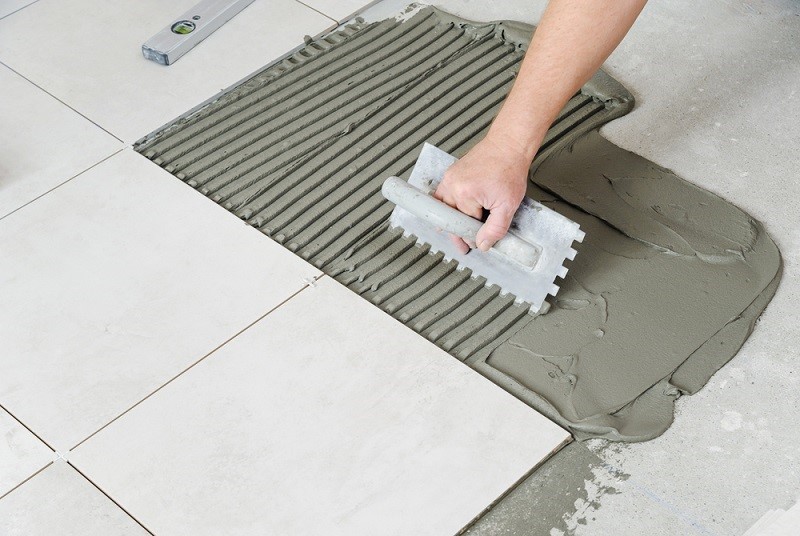
Notched trowels are used to spread adhesive and thin-set over a tile. These devices are available in different sizes and shapes. In regular trowels, you will get the notch facility on both sides of the blade.
The number of thin spaces to be left is important while running these trowels over the adhesive or thin-set. The quotient of leftover depends on the notch size. Relievable space amount grows proportionately with the trowel size. Notched trowels are generally rectangular in shape and there are spaced notches in between. They are mostly used during the application of cement, or when tiles are placed.
How to use
At the time you have decided to use Notched Trowel to spread adhesive or thin-set, please take note that the device stays in contact with the substrate. It assures that only the left behind material flows through the indentation. It will bring up a checkered pattern that will generate air pockets in turn. These air pockets prevent full contact between the tile and the material you are applying on the floor or tile.
Measuring the left-over with Notched Trowels
Notched trowel size indicates the amount of adhesive to spread on the substrate. It also determines the thickness of the adhesive bed beneath the tile.
If you use a square-shaped trowel with similarly sized notch and teeth, half of the capacity would go under a flat tile over a horizontal substrate.
The spaces between the ridges are identical to the ridge size. Thus, it splits the ridge height into two. This makes it possible to use it for epoxy flooring coating and also for laying ceramic tiles and plastic.
Therefore, a 12mm×12mm trowel leaves a 6 mm adhesive bed under the tile; the theory applies to trowels of every size.
On the contrary, if you try the same experiment with a U-shaped Notched Trowel, the adhesive bed beneath the file would occupy a little over one-third of the trowel teeth size, A 10 mm U-notched trowel will leave around 3mm adhesive bed below the tile installed. It is an ideal trowel for mosaic installation and you need to measure the teeth height, the notch gap and the weight of the trowel before you use it for cementing or for flooring installation.
Choose The Appropriate
We have just proved that you will get the same amount of left-over with a 10mm U-notched trowel as well as a 6mm square-notched trowel,
The difference in shape helps make a quick determination regarding comfort in bedding the tile over the adhesives. It seems easier to wriggle a tile into an adhesive bed put down with the help of a U-shaped Notched Trowel. Rounded ridges are more frequently collapse than square ones.
Square ridges, if used with square notched trowels, show a crumpling attitude on both sides while you try to embed the tile over the bed. If you try to push your tile down into the square ridges, the ridges may fold over from the top before spreading out. Check out the width, the depth and the distance between the teeth of the trowel to know how you can utilize it the best.
Your attempt to push a tile into the round-edged ridges spreads would make the adhesive ridge spread out instead of collapsing. The spreading will be effective from the bottom. The potential of air arrest within the tile ridges is obtrusively nil.
Conclusion
Driven by general rule, we can thus conclude that 12mm×12mm man-made tiles need one-fourth inch ridged-trowels, although many of the installers use 3/8 too. Mosaic installations till 2” can be comfortably done with 1/8 inch notches. Experts guide the fact in the same way as general rule governs the framing of wall tiles.